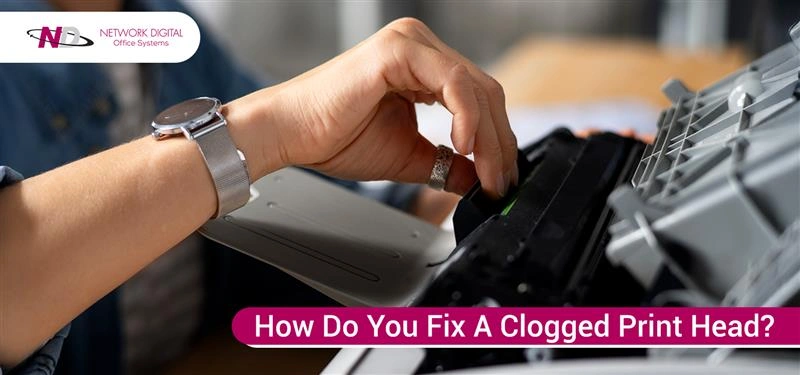
You’re looking at another failed print job. The prints are washed-out looking and streaky. Some of your text is gone entirely. Your important presentation pages are coming out blank. Ring any bells? You’re experiencing one of the most annoying printer issues: a clogged print head.
This is not only annoying. It’s costing you money. A failed print means wasted paper and ink. Alternatively, in the worst case, you may assume your printer is faulty and want to replace it.
Whether you’re frantically attempting to print last-minute papers or desperately attempting to salvage pricey photo prints, the guide will guide you through easy remedies. You don’t need technical knowledge.
We will start with the easiest to fix and move on to the most complex. We will eventually save on service call costs as your printer will function like new again.
What Is A Clogged Print Head?
A print head is the part in your printer that prints ink on paper. Its nozzles are very tiny holes. The holes are thinner than the width of human hair. Think of the print head as your printer pen, depositing small ink drops in exact places to form text, pictures, and graphics.
The latest print heads have hundreds or thousands of these tiny nozzles. Each can expel drops as small as a few picoliters, which are trillionths of a liter. The engineering that goes into this is phenomenal – these drops must be placed precisely in the correct location, measured in micrometers, to produce sharp, clear prints.
The print head is mounted on a carriage that moves back and forth across the paper. If you look in your ink cartridges, you’ll usually find it on the bottom. Moving back and forth, the head expels excellent drops of ink in quick succession. Timing has to be precise, in rhythm with the movement, to drop each drop in just the correct location.
How Print Heads Operate:
The print heads possess diverse, significant components in tandem. Tiny ink chambers hold the ink before it is expelled through the nozzles. Under each nozzle is located an actuator, either thermal or piezo, that supplies pressure to expel ink through the tiny holes. Control electronics manage the precise timing and level of ink expulsion.
When thermal actuators are employed, they heat the ink to form vapor bubbles that expel drops. Piezoelectric actuators rely on electrical charges to alter the shapes of crystals, driving ink through nozzles. This occurs thousands of times every second as your printer produces every line of text or image.
When Things Go Wrong:
When your nozzles are clogged, your printer is unable to spray ink. This creates problems with streaky or light prints, missing colors, blank pages, and low-quality prints. A clogged single nozzle may create noticeable gaps or lines in your prints. The newer small nozzles are more easily clogged by dried ink, dust, and air bubbles.
The print head is essentially the heart of your inkjet printer. Its ability to precisely control thousands of tiny ink droplets determines the quality, resolution, and color accuracy of everything you print. Understanding how this critical component works helps you appreciate why keeping it clean is so crucial for maintaining print quality.
Also Read: How to Fix Paper Streaks and Lines in Printer?
What Are The Causes For Clogged Print Heads?
Many things can clog your print head. Understanding these causes helps prevent future issues. Understanding what causes clogs helps you take the appropriate measures to maintain your printer effectively, preventing costly future repairs.
Let’s discuss the frequent reasons why your print head gets clogged.
1. Dried Ink
This is the most common cause of clogged print heads. If you do not use your printer frequently, the ink can dry up in the nozzles. The ink dries up, thickens, and clogs the tiny holes. This is because modern-day printers use water-based inks.
Once the water dries, hardened ink residue remains. A few weeks without use can precipitate this condition. The newer models have nozzles that clog more quickly because their nozzles are smaller in diameter.
2. Air Bubbles
Air can enter your ink cartridges, which can then migrate to the print head. These bubbles clog your nozzles. This occurs more frequently with newer, smaller nozzles because they are more responsive to variations in air pressure.
Air bubbles are created when cartridges are old, when you shake your cartridges too forcefully, or when the temperatures change. Once air bubbles find their way to your print head, they are like a cork in a bottle. They prevent the ink from flowing through your nozzles effectively.
3. Dust and Dirt
Dust particles can find their way into your printer and cause significant damage. When dust is combined with ink, it creates clogged print head nozzles due to the sticky nature of the dust. Printers that are not clean are more likely to suffer from this issue. The dust gets into paper paths, open covers on your printer, and ventilation slots.
Once in, dust particles adhere to moist ink and clump together. These lumps are significantly larger than the small nozzles. As time passes, dust accumulation worsens and can lead to permanent damage to the print head.
4. Improper Ink Types
The use of cheap or “universal” inks can produce subtle problems that aren’t immediately noticed. These inks may contain salts or heavy metals that will ruin nozzles over time. Different ink usage can also create clogs. A good ink has a specific viscosity as well as a precise chemical composition. Cheap inks are less likely to have consistent thickness levels that are acceptable for your printer layout.
However, they may also have particles that are too large for your nozzles. When switching between different brands of ink, you may end up receiving chemical reactions that create clogs or damage your print head irreparably.
5. Environmental Factors
Hot, dusty places increase the likelihood of clogs. Heat dries out ink more quickly, and fluctuations in humidity can cause air bubbles to form in cartridges. Air dust can settle in your printer and clog it.
Harsh temperatures also impact viscosity in inks. Cold places render inks very thick, while warm places render inks very thin. Either can cause improper ink flow in the print head’s nozzles.
Also Read: Why Is My Printer So Slow? Know the Fixes
How To Clean The Clogged Printer Heads?
It may sound intimidating to clean clogged printer heads, but doing the right thing will get your printer back in working order in no time. The ideal approach is to start with the mildest type of cleaning possible, then progress to more powerful cleaners if necessary.
Whether you’re with automatic software solutions or with manual hands-on cleaning, we’ve got you covered. Try these three levels of cleaning to restore your printer.
There are three levels of cleaning to try, ranging from mildest to most vigorous.
Level 1: Automatic Cleaning
Start with your internal cleaning program for your printer, as this is the easiest and safest option. All newer computers already have this included in their software.
Open your computer’s printer software and look for menus labeled “Clean Print Heads,” “Head Cleaning,” or “Nozzle Check.” The terminology may vary from manufacturer to manufacturer, but the process is the same for all brands.
Repeat the cleaning cycle twice, as one cycle is usually not sufficient to clean through tough clogs. Once every cleaning cycle is completed, print a test page to see if lines are missing or colors are streaky. Examine the test pattern closely to determine if all nozzles are firing as intended.
If you still see problems, then repeat the automatic cleaning process up to three more times. Don’t repeat it more than five times overall, though – too much cleaning is wasteful of ink as well as potentially destructive.
These can usually fix simple clogs. The automatic cleaner works to clean by pushing cleaning solution or new ink through the nozzles under pressure. This will dissolve light clogs and eject hardened ink particles.
Level 2: Manual Cleaning (The Windex Method)
Alternatively, use manual cleaning in case automatic cleaning is not working. This method is more hands-on and is safe among many users.
What You Need:
Gather lint-free paper towels or cloths, warm distilled water, and rubber gloves. Avoid using regular kitchen faucet water, as it contains minerals that can damage electronic parts. Windex is suitable for use as a solution, as it contains ammonia to help loosen dried ink. Ensure your towel is lint-free to prevent fibers from being deposited on your print head.
Stepwise Procedure:
Power on your printer by turning it on and allowing it time to complete the startup procedure. As soon as the head starts to move towards the home position, unplug the printer. You must do this as soon as possible to ensure the head is easily accessible from the parking area.
Handle all ink cartridges gently and place them in plastic bags to prevent them from drying out. This will preserve your valuable cartridges while you clean the print head. Take a paper towel that you can fold over four times to create a stiff absorbent pad. Soak the towel in warm water or Windex, but not in immersion. Too much liquid can damage electronic components.
Position the damp towel where the print head goes when in position. Move the print head slowly back and forth over the towel. You will notice ink coming off on the towel. This indicates that dried ink is breaking loose and coming out of the nozzles. Change the towel when it becomes dirty with ink, and repeat the cycle with another new, damp towel.
Repeat this process until you see no more ink on your towel. This implies that you have cleaned most of your caked ink. Allow all these to dry for approximately 10 minutes before placing the cartridges back. This helps to avoid water from penetrating electrical connections. Then, reinstall your cartridges and conduct a test print to view your outcome.
Level 3: Tough Clog Deep Cleaning
To remove heavy blockages that are not responding to gentler methods, you will need to eradicate the print head. This is a more technical and risky approach, so you should only attempt it when other methods are not succeeding.
Soaking Method:
Carefully remove the print head from your printer according to the instructions in your manual. All models differ in their removal procedures, so take no guesses. Prepare a shallower dish filled with warm distilled water. The water is warm, not boiling, as extremely high temperatures can damage plastic components.
Put the print head in the dish with the nozzle end down. Ensure that only the nozzle end is in the water, not the electrical contacts. For hardened clogs, use a solution of warm water with a few drops of household ammonia. The ammonia aids in breaking up hard ink lumps that can’t dissolve in plain water.
Soak the print head for a few hours or overnight in cases of extreme clogs. You will see dried ink dissolve into the liquid over time. You will notice tinted water as ink departs from the nozzles. Remove any residue from cleaning solutions by rinsing the print head with warm, distilled water after soaking. Allow drying thoroughly before reinstalling, which can take several hours, depending on the humidity.
Syringe Method (Advanced):
This method is for the most stubborn clogs but requires careful handling. Remove ink cartridges and set them aside safely. Fill a syringe with distilled water or cleaning solution. Use rubber tubing to connect the syringe to the ink inlet ports on the print head. This creates a sealed connection that allows you to push cleaning solution directly through the nozzles.
Slowly introduce the cleaning solution into each color port, looking for fluid to flow onto a paper towel placed under the print head. If fluid appears, the channel is open. Repeat this process for all colors until fluid flows freely from each group of nozzles. Handle pressure extremely carefully, as excessive pressure can damage internal components.
Essential Safety Reminders:
Always use distilled instead of tap water, as the latter will deposit mineral particles. Moist hands or objects should never come into contact with electronic contacts, as this can cause permanent damage. Treat the print head with care, as it is a fragile item that is extremely expensive to replace.
Allow all components to dry thoroughly before reassembling your printer, as dampness in electrical connections may cause a short circuit. Wear gloves to protect your hands from ink stains and cleaning solvents.
Network Digital Office Systems – Printing Issues Stop Here, Productivity Starts Here
Fixing a clogged print head is usually a straightforward process when you follow the proper steps. Start with automatic cleaning first because it’s the safest method and works for most common clogs.
If that doesn’t solve the problem of printers, then use manual cleaning with Windex or boiling water. In most clogged drains, more extensive cleaning procedures, such as soaking or rinsing, will be necessary.
Network Digital Office Systems is all about providing reliable, affordable printed solutions to keep your office up and running. For over 40 years, they have offered flexible rental programs, allowing you to transition to newer technology while keeping your costs under control.
Don’t let clogged up print heads and equipment breakdowns restrict you.
Call (973) 882-3000 today to schedule your complimentary client analysis and discover how Network Digital can transform your printing experience. Visit networkdig.com to view their entire office printing solutions.
Frequently Asked Questions
1. How Do I Automatically Unclog A Print Head?
Utilize your printer’s cleaning function. Access your printer program and look for “Head Cleaning” or “Clean Printhead.” Execute the cleaning cycle twice. After each cycle, print a test page to check if the improvement is noticeable. Repeat up to five times if necessary, but avoid overdoing it, as excessive cleaning can be wasteful in terms of ink.
2. How to Restore Print Heads?
For dried-out print heads, soak in warm distilled water for several hours or overnight. For clogged nozzles that are tough to remove, blend warm water with household ammonia. Rinse thoroughly and dry completely before reinstalling. If this is an extreme case, use a syringe with tubing to push the cleaning solution through the nozzle holes.
3. What If The Print Head Is Clogged?
Clogged print heads cause streaky prints, missing colors, faded text, or blank pages. Initially, you’ll see inconsistent colors and gaps in text. As clogs worsen, entire colors disappear or pages print completely blank. Eventually, clogs can become permanent and necessitate the replacement of the print head at a significant expense.
4. What Is the Ideal Solution for Cleaning the Print Head?
Distilled water is the safest option for print heads. For stubborn clogs, use Windex or ammonia-based cleaners, as ammonia helps dissolve dried ink. Never use tap water as it contains minerals that damage printers. Always use lint-free cloths to prevent fibers from adhering to components.


