Do you despise scribbly documents that seem unprofessional?
Do your colorful presentations have weird lines going through them?
You may have noticed that your writing is uneven or smudged together, which makes your valuable documents appear crooked and difficult to read.
You’re not alone in enduring these annoying printer issues. The problems occur because of incorrect alignment of your printer, and they’ll disrupt anything from business reports to family portraits. Such problems usually happen at the worst possible time, when you’re most likely to need to print something urgently.
Dull printing, characterized by weak and streaky ink lines across the paper, along with gaps where portions of your writing do not print, is a symptom of alignment issues. You may also experience entirely blank sheets of paper after hearing every right noise from your printer, but receiving nothing helpful.
These issues cost you more time, money, and patience. You’re stuck printing sheet after sheet, purchasing new ink cartridges because you assume that’s the solution, and you’re impatient at times of urgency, and your printer fails to function.
The good news is that printer misalignment issues have remedies that don’t require pricey repairs or technical expertise. This guide will help you understand why you experience these irritations and how to solve them easily and promptly.
You’ll also learn how to prevent alignment problems from happening again. This will cost you ink, time, and future worries.
What Is The Printer Alignment Issue?
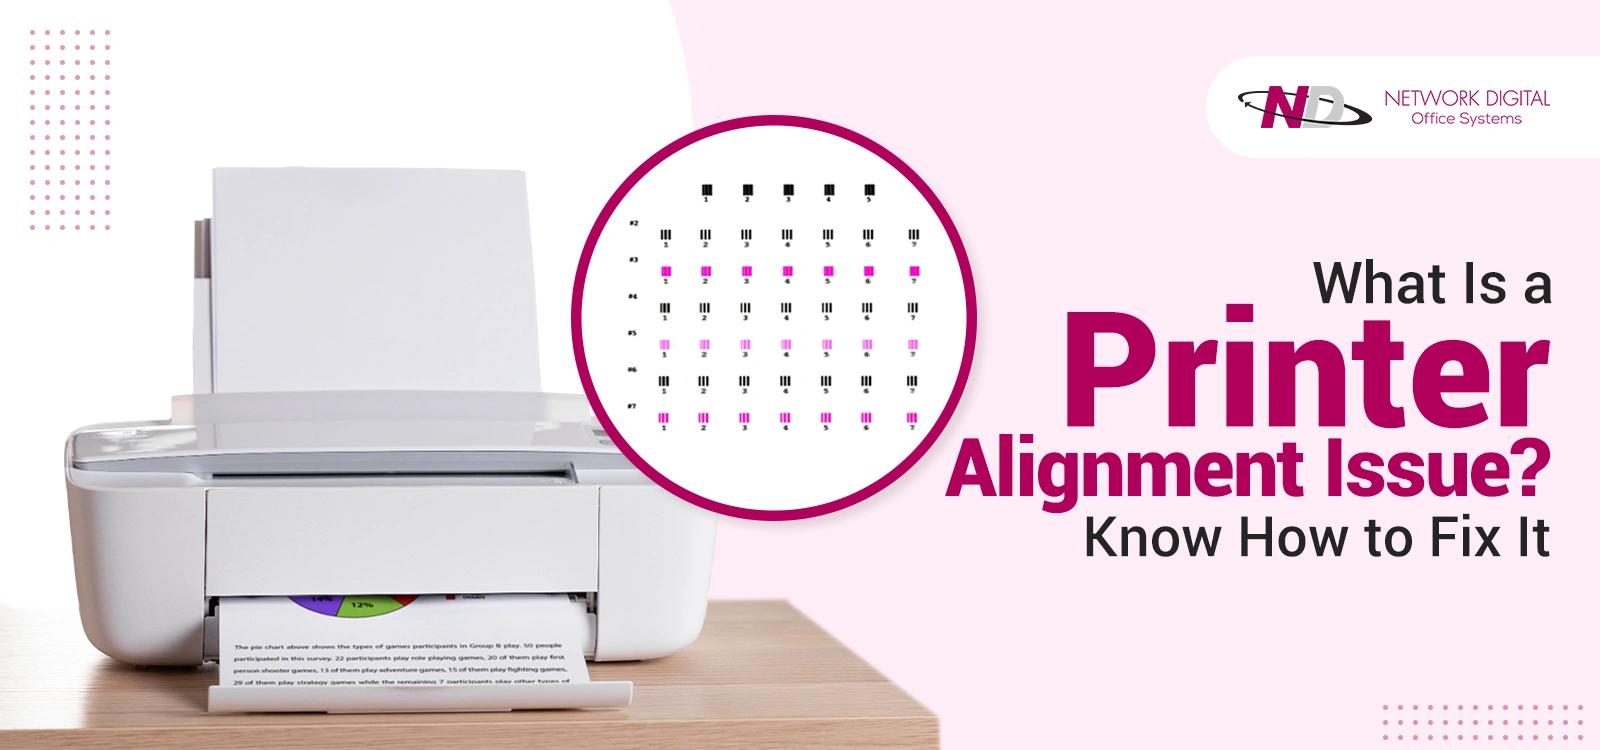
A print misalignment occurs when the nozzles of the print head are not correctly aligned. The print head contains many small nozzles that print ink onto paper. When the nozzles are not well aligned, several problems arise that lower the page’s quality.
Faint lines appear in printed colors when items are not correctly aligned. This happens because the color nozzles are not landing on the paper where they should. You might also see blurry or fuzzy text that looks unclear and unprofessional. Color bleeding occurs when ink spreads beyond its intended area.
Crooked or wavy lines are also common indications of misalignment. The lines or pictures appear distorted rather than straight and clean. You may also see horizontal or vertical lines on your printouts, creating unwanted lines that penetrate your documents.
Print head alignment makes the color nozzles print in harmony. The process ensures that the nozzles of each color print simultaneously, thereby maintaining good print quality. Without alignment, even new ink cartridges won’t produce clear printing. The alignment process aligns the exact timing and position of each color to yield clear, professional-quality documents.
Also Read : How Do You Fix A Clogged Print Head?
What Is A Common Misalignment Of A Printer?
When your printer emits misaligned prints, it is not just occurring by chance. There is a valid explanation for such irritating issues. Understanding the causes of misaligned printing is a crucial step toward preventing them from interfering with future work.
From physical impacts to program flaws, every issue impacts how well ink is placed on paper by your printer. By identifying these key issues, you’ll have specific steps to follow for maintaining healthy printer function and preventing costly reprints.
1. Physical Activity
Printer movement is a frequent cause of misalignment. Repeatedly relocating the printer will shake its components and impact the precise position of the print head. When you relocate your printer, the delicate components on the inside will shift position ever so slightly and become misaligned.
Placing the printer on wobbly surfaces also results in alignment issues. Unsteady desks, tilted shelves, or shaky surfaces may alter the internal position of the printer gradually. The slight movements tend to strain the precise setting of the print head.
Vibrations from equipment nearby produce similar issues. Air conditioners, washing machines, or machinery operating nearby transfer vibrations that distort the alignment of the structure. Office-goers walking in busy office environments even produce vibrations that affect sensitive elements of the printer.
2. Paper Problems
An incorrect paper setting in the printer’s software causes alignment issues. When a printer is specifically searching for a paper size but receives a different size, the printer will not know how to place words and pictures precisely. The incorrect size results in a slanted print of low quality.
Poor paper quality affects how the ink absorbs and distributes on it. Thin, rough, or irregular paper may increase the effort of the print head and potentially become displaced. The irregular surface of cheap paper makes it difficult for the printer to maintain the proper alignment on the entire page.
Paper jams that affect the position of the print head are incredibly harmful. When a paper jam occurs, you may attempt to pull it forcefully, which might shift the print head mechanism. The print head, after fixing the jam, might still be slightly misaligned until you perform an alignment procedure.
3. Maintenance Issues
Dust and dirt buildup are a significant cause of alignment issues. Over time, paper bits, dust, and other small particles gather inside the printer. This buildup can block the smooth movement of the print head carriage and cause it to position incorrectly.
Dried ink in nozzles can cause blockages that stop ink from flowing onto paper. When some nozzles are blocked and others are not, the print appears uneven and misaligned. The blocked nozzles cannot help with their part of the image, which leaves gaps or causes other colors to mix incorrectly.
Long stretches of inactivity allow ink to thicken and dry out inside nozzles. This causes partial blockings of ink flow and pressure. When you resume printing after a long period of inactivity, you face uneven ink flow and consequently alignment problems until the system is cleaned and calibrated.
Printer roller adhesive buildup affects the movement of paper in the printer. When rollers become uneven or tacky due to excess adhesive from labels or cheap paper, they fail to feed paper smoothly. The uneven paper movement means issues in paper alignment in the printed finish.
Also Read : How to Fix Paper Streaks and Lines in Printer?
4. Software Issues
Incorrect printer driver settings lead to alignment issues that appear to be hardware problems but actually result from software. If the driver settings do not correspond to either your printer type or paper type, the printer receives inaccurate position instructions.
Incorrect paper size in the software causes incompatibility between the computer’s instructions and the printer’s results. The printer computes position by software setting instructions, so erroneous instructions result in printing inaccuracies.
Outdated drivers for the printer may not function optimally with the current printer software. Since manufacturers update products to improve performance and fix issues, older drivers may have glitches that newer drivers have already resolved.
5. Daily Usage
Extended use impacts alignment due to the passage of time, as mechanical elements tend to deteriorate. The motors, gears, and belts used by the small motors to position the print head have progressive degradation that impacts their accuracy. Continued use for months and years gradually lowers the positioning system’s accuracy.
Age-related mechanical issues arise from the drying of lubricants and moving components taking on slight slack. Springs tend to lose rigidity, and plastic components take on minute cracking or warping. These gradual evolutions over a span of usage tend to affect the printer’s ability to hold correct alignment.
How Do You Fix Printer Alignment Issues?
Now that you understand why you have alignment problems, it’s time to take action and fix them. If you’re wondering how to fix my printer printing page uneven, the good news is that the overwhelming majority of alignment issues can be corrected using the built-in software that comes with your printer. You won’t need advanced technical knowledge, and you won’t have to spend money on expensive repairs.
Most modern printers include an automatic alignment feature that removes the guesswork from the process. The device will guide you step by step, making it easy to adjust the print head and improve accuracy. In many cases, simply running the alignment utility from your printer settings can resolve uneven margins, misaligned text, or skewed images.
What you need to determine is which approach works best for your specific printer brand and model. Different manufacturers may place alignment options in slightly different locations within their software, but the overall process is usually straightforward and user-friendly.
There are three key ways to fix alignment problems, and we will explain each of them in detail. Select the method that best suits your printer type and your level of comfort with technology. Before starting, make sure you have plain A4 paper ready, as most alignment processes require printing a test page to complete the setup properly.
Method 1: From the Printer Menu
Step 1: Switch on the printer and insert 3-4 A4 sheets. Ensure the paper is aligned straight in the paper tray, and you have sufficient numbers for the entire alignment process. Plain white paper is ideal for this because test patterns get easily viewed on it.
Step 2: Get to the printer menu by pressing the Home button on the printer. Browse the menu until you find the options for maintenance. The “Maintenance” menu should appear; click on OK to open the maintenance menu. The organization of these menus will depend on the printer, but most device manufacturers include alignment controls inside the maintenance or tools menu.
Step 3: Begin the alignment process by choosing “Print Head Alignment” and tapping OK. Begin with “Vertical Alignment” as it will likely fix the most frequent misalignments. The printer will guide you with on-screen prompts. When instructed, insert A4 plain paper and adjust paper guides.
Step 4: Read the test page’s printed instructions and select the best pattern. The printer will print a few dozen numbered patterns, and you have to determine which of these appears the clearest and best aligned. Type in the best pattern’s number on your printer’s control panel and repeat for horizontal alignment if prompted.
Method 2: Changing Computer Settings
Step 1: Connect your printer using a wireless connection or by a USB cable. Make sure the connection is stable and that the printer is detectable on the computer before aligning it.
Step 2: Open your computer’s control panel to find printer settings. Go to the Control Panel and look for printing options. Click on “View Printer & Drivers” to see all the printers you have installed. Right-click on your printer icon to open a menu with different printer management choices.
Step 3: Begin alignment by clicking “Printer Preference” from the menu. This opens the printer’s settings box. Select the “Maintenance” tab, which contains various printer care tools. Click “Print Head Alignment” to start the alignment wizard that will help you with the process.
Step 4: Print test patterns and pick the best ones. The program will display the printed patterns on the monitor and ask you to select the pattern that appears most lined up. Be choosy, for they will impact how well succeeding prints will be lined up. The PC will automatically use your selections to improve print quality.
Method 3: Registration by Hand (Canon Printers)
Step 1: Access the printer driver setup window from the printer settings of your computer. This approach gives you more authority over the process of alignment but requires you to focus more on details.
Step 2: Turn on manual alignment by choosing “Custom Settings” on the Maintenance page. Find the checkbox “Align heads manually” and check it to turn on manual control. Click OK to confirm the settings and align the printer for manual alignment mode.
Step 3: Put three sheets of A4 paper into your printer’s paper tray. Make sure the paper is in the right place and that the guides are set correctly. You usually need to do a few test prints to align it manually, so it’s good to have enough paper ready.
Step 4: Check the on-screen guidance on how to select the best patterns. By doing it manually, you have more patterns to select from and more control over how they align. Make sure you check each pattern well and pick those with the best lines and color depiction.
Also Read: Why Is My Printer Not Responding? Know How to Fix It
What Are The Prevention Measures Against Alignment Issues?
Prevention is better than cure, especially when it comes to printer maintenance. Once you learn how to correct misalignment, the best approach is to prevent them from arising in the first place. Acting early saves you future ink, trouble, and hours.
The best news about preventing alignment issues is that you don’t have to use pricey tools or technical steps. Simple habits and frequent maintenance can keep your printer running well for years. Most prevention steps require a few minutes but will save you hours of troubleshooting issues down the line.
If you follow these tips, you will not only prevent alignment issues but also make your printer last longer and keep the print quality steady. Consider these tips to improve your printer’s performance and feel more relaxed.
1. Routine Care
Align print heads every three months to maintain the best print quality. Periodic alignment prevents minor issues from becoming major issues. Add a reminder on your calendar to perform this maintenance routinely. Even if your prints seem okay, periodic alignment ensures they remain at optimal quality.
Prevent dust from building up inside by cleaning your printer periodically. Dust the exterior and other cleanable interior components with a soft, lint-free cloth. Be sure to clean the paper path and regions where dust naturally congregates. Keep your printer well-maintained and clean by following the cleaning advice of your manufacturer and the cleaning materials.
2. Correct Usage
Always test print on plain paper initially before printing on significant documents. Test printing identifies issues of misalignment before they happen on critical materials. Test using plain paper, rather than specialty or photo paper, to save on expensive materials.
Set the correct paper size on your printer and software. Ensure that the paper size set on your document is identical to the paper in your printer. As the setting is not matched, it usually results in misplacement, which may be prevented by setting it carefully.
Line up print heads using new ink cartridges because new cartridges can have varying characteristics from the older ones. Cartridges from the same maker, even, have minor differences that impact alignment. Running an alignment following cartridge changes guarantees the best performance from the beginning.
3. Environmental Care
Place the printer on a firm and sturdy base to prevent issues with alignment due to vibrations. Choose a location with a sturdy desk or table that won’t shake or flex when the printer is printing. The base should be level and large enough to accommodate the entire printer without any edges overhanging.
Avoid frequent relocation of the printer, as each movement can unsettle its sensitive components. When relocating the printer, do so carefully and inspect it for alignment afterward. When you have the means, establish a permanent location for your printer to minimize issues from moving it.
Keep the printer away from things that shake, like air conditioners, washing machines, or busy pathways. Shaking from these things can slowly change how the printer is aligned over time. Pick a calm, steady place where the printer can work without being disturbed by outside noise.
4. Software Maintenance
Update printer drivers regularly so that your computer operates efficiently with your printer. Companies usually offer updates of drivers that enable things to function better and fix issues. Check for updates at least every month or enable automatic updates if your system supports it.
Make sure that your label design program is up to date if you regularly print labels or specialities. Program updates usually include better print accuracy and calculation for centering. Running the latest software versions ensures you won’t encounter compatibility issues that could lead to misalignment.
Verify the printer settings before printing to ensure the desired output is achieved. Check the paper size, print quality, and media type to ensure they align with materials and requirements. Focusing on checking these settings prevents numerous issues with alignment.
5. Quality Settings
Select “Best” print quality on essential documents if precise alignment is critically important. The high-quality print settings have better alignment software and error correction. This takes more ink and longer, but the better precision is worth it on professional documents.
Set the proper media type in the printer’s settings to have the printer perform well on your paper. Different media types require different ink usage and timing; setting the proper type ensures everything falls into place correctly on various materials.
Choose a margin that is suitable for the paper size and do not print near the margin edge, as this will present alignment issues. The best margins allow you space that accommodates minor differences in alignment without shifting the location of the material on the page.
Network Digital – Where Office Printing Solutions Work
Printer alignment issues are issues that you can correct, and they influence how well printed pages appear. You can resolve these issues by understanding and maintaining your printer. Maintaining a schedule prevents most alignment issues and ensures your printer works well. When issues occur, the pre-programmed alignment software from most printer manufacturers gives excellent solutions that rapidly restore print quality.
However, if problems with alignment continue to recur even with the best efforts, or if issues with printers happen more frequently than they should and impact business, it could well be time to consider professional print services. Continually dealing with alignment problems, using ink for test printing, and losing efficiency on account of maintaining the printer may cost you more business than you anticipate.
Network Digital provides reliable office printing services that ensure your business operates smoothly, eliminating the possibility of common printer problems. Now with over 40 years of experience and having won the ELITE Dealer distinction from ENX Magazine, Network Digital provides variable rental and lease offers that enable you to use the best printing technology without the woes of ownership.
Let not printer problems disrupt business. Call Network Digital today to take advantage of a complimentary client analysis. Discover how their top-quality printing services at reasonable costs can boost office productivity. Visit their website to see how they offer a range of commercial printers, office copiers, and rental equipment tailored to business needs.


